前言
这是音频编解码器的第三篇文章,也是收官文章,上一篇文章中,我们讲了如何制作一个自定义的特色进度条,现在,我们需要将进度条的刷新与编解码器的进度绑定起来,如此进度条才有意义,因为编解码器比较吃算力(虽然看起来ADPCM的算法非常的简单,但是奈何笔者采用的是python脚本通过循环调用C编译的exe可执行文件来实现的编码,因此算上python本身的性能,加上反复调用exe可执行文件的系统操作开销,导致ADPCM的计算时间也是不可忽视的,尤其在大数据量时),因此我们需要对编解码器单独开一个子线程跑,这样,在编解码器运行时,QT界面也能正常使用不受影响。既然编解码器是由子线程跑,那么为何不也为进度条开一个子线程,两个之间沟通消息,这样编码器与进度条的运行都不会影响QT界面的运行,而且也给进度条的使用提供了一个范式,以后再有其它功能需要使用进度条时复制粘贴即可。
Python中的线程
Python处理线程的模块有两个:thread 和 threading。Python 3已经停用了 thread模块,并改名为 _thread 模块。Python 3在 _thread 模块的基础上开发了更高级的 threading 模块,因此我们现在用的线程模块都是 threading 模块。
创建线程
1
|
threading.Thread(target=None, name=None, args=(), kwargs={})
|
target 指要创建的线程的方法名,name 指给此线程命名,命名后可以调用 threading.current_thread().name 方法输出该线程的名字, args/kwargs 指 target 指向的方法需要传递的参数,必须是元组形式,如果只有一个参数,需要以添加逗号。
线程之间的消息传递
线程与线程之间的通信是一个常见的需求。Python提供了几种方法来实现进程与进程之间的通信,常见的方式包括:queue.Queue、threading.Event、threading.Lock等同步原语。
使用 queue.Queue 进行线程通信
queue.Queue 是线程安全的队列,适合用于线程之间的数据传递。你可以在子线程中将数据放入队列,然后在主线程中读取。
示例代码:
 1
 2
 3
 4
 5
 6
 7
 8
 9
10
11
12
13
14
15
16
17
18
19
20
21
22
23
24
25
26
27
28
29
|
pythonCopy Codeimport threading
import queue
import time

# 子线程函数
def worker(q):
    for i in range(5):
        time.sleep(1)  # 模拟一些工作
        q.put(f"Message {i}")  # 将消息放入队列
        print(f"Worker: Sent message {i}")

# 主线程
def main():
    # 创建一个队列
    q = queue.Queue()

    # 创建并启动子线程
    t = threading.Thread(target=worker, args=(q,))
    t.start()

    # 主线程从队列中接收消息
    for _ in range(5):
        msg = q.get()  # 阻塞直到队列中有数据
        print(f"Main Thread: Received {msg}")

    t.join()  # 等待子线程结束

if __name__ == "__main__":
    main()
|
解释:
- 子线程
worker 将一些消息放入队列 q 中。
- 主线程从队列中获取消息并打印。
queue.get() 是阻塞的,直到队列中有新的数据。
q.put() 和 q.get() 是线程安全的,可以在多个线程之间安全地交换数据。
使用 threading.Event 进行线程通信
threading.Event 是一个简单的同步原语,允许线程在等待某个条件发生时进行通信。例如,主线程可以等待子线程完成某些操作,或者子线程可以通知主线程某个事件已经发生。
示例代码:
 1
 2
 3
 4
 5
 6
 7
 8
 9
10
11
12
13
14
15
16
17
18
19
20
21
22
23
24
25
26
|
pythonCopy Codeimport threading
import time

# 子线程函数
def worker(event):
    time.sleep(2)  # 模拟一些工作
    print("Worker: Setting event")
    event.set()  # 设置事件,通知主线程

# 主线程
def main():
    # 创建一个事件对象
    event = threading.Event()

    # 创建并启动子线程
    t = threading.Thread(target=worker, args=(event,))
    t.start()

    print("Main Thread: Waiting for event")
    event.wait()  # 阻塞,直到子线程设置事件
    print("Main Thread: Event received")

    t.join()  # 等待子线程结束

if __name__ == "__main__":
    main()
|
解释:
- 子线程在执行完某些任务后调用
event.set() 来通知主线程。
- 主线程使用
event.wait() 来等待事件的发生,wait() 会阻塞直到事件被设置。
使用 threading.Lock 和共享变量
如果需要在多个线程之间共享一些资源(如变量),可以使用 threading.Lock 来避免竞争条件(race condition),确保数据的一致性。
示例代码:
 1
 2
 3
 4
 5
 6
 7
 8
 9
10
11
12
13
14
15
16
17
18
19
20
21
22
23
24
25
26
27
28
29
30
|
pythonCopy Codeimport threading
import time

# 共享变量
shared_data = 0
lock = threading.Lock()

# 子线程函数
def worker():
    global shared_data
    for _ in range(5):
        time.sleep(1)  # 模拟工作
        with lock:  # 使用锁保护共享资源
            shared_data += 1
            print(f"Worker: Incremented shared_data to {shared_data}")

# 主线程
def main():
    # 创建并启动子线程
    t = threading.Thread(target=worker)
    t.start()

    t.join()  # 等待子线程结束

    # 访问共享资源
    with lock:  # 同样使用锁保护共享资源
        print(f"Main Thread: Final shared_data is {shared_data}")

if __name__ == "__main__":
    main()
|
解释:
shared_data 是一个主线程和子线程共享的变量。- 使用
threading.Lock() 来确保只有一个线程能够访问和修改共享数据,从而避免了数据的竞争。
使用 threading.Condition 进行更复杂的通信
threading.Condition 是一种更复杂的同步机制,允许线程在某个条件发生时进行等待和通知。它结合了 Lock 和 Event 的特性,适用于更复杂的线程间协调问题。
示例代码:
 1
 2
 3
 4
 5
 6
 7
 8
 9
10
11
12
13
14
15
16
17
18
19
20
21
22
23
24
25
26
27
28
29
30
31
|
pythonCopy Codeimport threading
import time

# 共享资源和条件变量
shared_data = 0
condition = threading.Condition()

# 子线程函数
def worker():
    global shared_data
    time.sleep(2)  # 模拟工作
    with condition:
        shared_data = 42  # 修改共享数据
        print("Worker: Shared data set to 42")
        condition.notify()  # 通知主线程

# 主线程
def main():
    # 创建并启动子线程
    t = threading.Thread(target=worker)
    t.start()

    with condition:
        print("Main Thread: Waiting for condition")
        condition.wait()  # 等待通知
        print(f"Main Thread: Shared data is {shared_data}")

    t.join()  # 等待子线程结束

if __name__ == "__main__":
    main()
|
解释:
- 子线程修改共享数据并使用
condition.notify() 通知主线程。
- 主线程通过
condition.wait() 等待子线程通知,直到条件满足才继续执行。
接下来我们看一下编解码器UI是如何调用编解码器以及编解码器如何与进度条进行消息传递的
编码器UI设计
编码器的UI布局在上一篇文章中已经阐述过,在这里就不做过多的赘述,直接放上代码:
 1
 2
 3
 4
 5
 6
 7
 8
 9
10
11
12
13
14
15
16
17
18
19
20
21
22
23
24
25
26
27
28
29
30
31
32
33
34
35
36
37
38
39
40
41
42
43
44
45
46
47
48
49
50
51
52
53
54
55
56
57
58
59
60
61
62
63
64
65
66
67
68
69
70
71
72
73
74
75
76
77
78
79
80
81
82
83
84
85
86
87
88
89
90
91
|
import sys
from PyQt5.QtWidgets import *
from PyQt5.QtGui import *
from PyQt5.QtCore import *
from PyQt5.QtSvg import *
import threading
import queue

from component.btnStyle import *
from component.editStyle import *
from component.getPath import *
from component.progressBar import *
from tools.adpcmcoder.adpcmEncRun import *
from tools.adpcmcoder.adpcmDecRun import *

class WAcodec(QWidget):
    def __init__(self):
        super().__init__()
        self.filePaths = ['']
        self.initUI()

    def initUI(self):
        self.layout = QVBoxLayout()
        self.setLayout(self.layout)
        # 文件选择
        self.filelayout = QHBoxLayout()
        self.lable = QLabel("请选择文件",self)
        self.filelayout.addWidget(self.lable)
        self.input = QLineEdit(self)
        LineEditStyle(self.input)
        self.filelayout.addWidget(self.input)
        self.choosebtn = QPushButton("选择文件",self)
        btnReleaseStyleA(self.choosebtn)
        self.choosebtn.clicked.connect(self.getpath)
        self.filelayout.addWidget(self.choosebtn)
        self.layout.addLayout(self.filelayout)

        # 编码器选择
        self.codeclayout = QHBoxLayout()
        self.codeccb = QComboBox(self)
        self.codeccb.addItem('ADPCM')
        self.codeclayout.addWidget(self.codeccb)
        self.layout.addLayout(self.codeclayout)

        # 编码解码选择
        self.encdeclayout = QHBoxLayout()
        self.encdecbtn = QPushButton("编码",self)
        btnReleaseStyleA(self.encdecbtn)
        self.encdecbtn.clicked.connect(self.encodeRun)
        self.encdeclayout.addWidget(self.encdecbtn)
        self.decbtn = QPushButton("解码",self)
        btnReleaseStyleA(self.decbtn)
        self.decbtn.clicked.connect(self.decodeRun)
        self.encdeclayout.addWidget(self.decbtn)
        self.layout.addLayout(self.encdeclayout)

        # 进度条
        self.runlayout = QVBoxLayout()
        self.progress_bar = ProgressBar()  # 自定义进度条
        self.runlayout.addWidget(self.progress_bar)

        self.layout.addLayout(self.runlayout)


    def getpath(self):
        get_path(self)
        self.input.setText(self.filePaths[0])

    def encodeRun(self):
        if self.input.text() == '':
            print("未选择文件")
            return

        q = queue.Queue()
        self.progress_bar.init_grids()

        if self.codeccb.currentText() == 'ADPCM':
            # 以多线程并发的形式规避ADPCM编解码时带来的卡顿问题
            threading.Thread(target=ADPCMencodeRun, args=(self.input.text(),q), daemon=True).start()
        threading.Thread(target=self.progress_bar.update_progress,args=(q,), daemon=True).start()
    def decodeRun(self):
        if self.input.text() == '':
            print("未选择文件")
            return

        q = queue.Queue()
        self.progress_bar.init_grids()

        if self.codeccb.currentText() == 'ADPCM':
            threading.Thread(target=ADPCMdecodeRun, args=(self.input.text(),q), daemon=True).start()
        threading.Thread(target=self.progress_bar.update_progress,args=(q,), daemon=True).start()
|
PyQt5部分的代码已经是老朋友了,获取文件,下拉选框,两个按钮。进度条的设计在上一篇文章中详细介绍过,这里着重介绍按钮按下时,创建线程执行编解码器与进度条
以解码器为例:
- 使用
threading.Thread函数创建线程,target传入线程需要调用的方法,即ADPCMdecodeRun,解码启动脚本,args向ADPCMdecodeRun方法传入参数,文件路径与队列对象,队列对象用于保存和传输消息,daemon表示该线程是否为守护线程,如果是,则它会在主线程结束时自动终止,哪怕它的任务没有结束,如果不是,则如果它的任务没有结束,程序会等待它执行完毕才会结束
.start表示启动该线程
解码器启动脚本
介绍完如何开启线程与线程之间如何进行通信,那么我们接下来就实现解码器的启动脚本,并在解码器的启动脚本中做一些小小的设计:
- 设置一个
percent,来记录当前已解码的进度,percent记录的是 已解码行数/总行数
- 因为进度条共有100个格子来表示
0%,1%,...,100%,因此进度条应接收整数的1,2,3,4,...,进而percent应该是整数,且+1后通过put方法,向进度条传递消息
- 进度条通过
get方法阻塞自己,等待解码器的消息,当解码器传递来新的消息时,就会触发更新进度条。
接下来我们看编码器的启动脚本代码:
 1
 2
 3
 4
 5
 6
 7
 8
 9
10
11
12
13
14
15
16
17
18
19
20
21
22
23
24
25
26
27
28
29
30
31
32
33
34
35
36
37
38
39
40
41
42
43
44
45
46
47
48
49
50
51
52
53
54
55
56
57
58
59
60
61
62
|
import subprocess
import queue
import sys

def ADPCMdecodeRun(filepath,q):
    print("ADPCM decode start")
    with open('workspaces/pcm.txt', 'w') as fw:
        fw.close()

    error = []
    linecount = 0
    totalcount = 0
    progressblock = 0
    percent = 1
    if sys.platform == 'win32':  # 仅在 Windows 上使用这个设置
        creation_flags = subprocess.CREATE_NO_WINDOW
    else:
        creation_flags = 0  # 在其他平台上没有必要使用这个参数
    ###···················DEXP ADPCM解码··························
    with open(filepath,'r') as f:
        print("ADPCM decoding ...")
        adlist = []
        adlist.append('00')
        adlist.append('00')
        lines = f.readlines()
        totalcount = len(lines)
        progressblock = totalcount / 100
        for line in lines:
            for i in range(len(line)):
                if line[i] == ' ' or line[i] == '\n':
                    adlist.append(line[i-2:i])
            # 若打包,用下面路径
            #args = ["_internal/res/AdpcmCodec/adpcmdecoder.exe"] + adlist
            # 若调试,用下面路径
            args = ["src\\tools\\adpcmcoder\\adpcmdecoder.exe"] + adlist
            #print(args)
            result = subprocess.run(args, capture_output=True,text=True,creationflags=creation_flags)
            #print("STDOUT:", result.stdout)
            #print("liencount:",linecount)
            if result.returncode != 0:
                error.append(linecount)
            else:
                hex_list = result.stdout.split()
                adlist.clear()
                adlist.append(hex_list[len(hex_list)-2])
                adlist.append(hex_list[len(hex_list)-1])
                hex_list.pop()
                hex_list.pop()
                hex_list = ' '.join(hex_list)
                with open('workspaces/pcm.txt','a') as fw:
                    fw.write(hex_list)
                    fw.write("\n")
                    fw.close()
            linecount += 1
            if linecount > percent * progressblock:
                #msg = f"已完成{percent}%"
                q.put(percent)
                #print("msg:",msg)
                #print("linecount:",linecount)
                percent += 1
    q.put(percent)
    print("ADPCM decode end")
|
在这段代码中,可以看到,ADPCMdecodeRun方法除了接收文件路径外,还接收一个q变量,即Queue对象,这样,在该线程中可以使用队列对象来传递消息,我们来依次解释一下代码:
- 写文件,使用
w打开后直接关闭,达到一个创建文件,若文件存在,则清空文件中的内容的目的(因为后面我们用a命令在文件中追加内容,如果不提前清理文件,则会在同名文件下追加内容导致数据会乱)
- 默认情况下,Windows会弹出命令窗口(CMD)以运行程序,在此python脚本中,因为会循环调用CMD来启动解码器
adpcmdecoder.exe,因此会导致CMD窗口被反复打开又关闭。为避免这个CMD窗口弹出,可以通过设置subprocess的creation_flags参数来隐藏它。具体来说,你可以使用 subprocess.CREATE_NO_WINDOW 来防止命令行窗口的出现。这对于 Windows 系统特别有效。
totalcount获取总行数,progressblock为总行数的1%- 循环读取数据,并将数据放入解码器中,注意,这里使用的是ADPCM解码器,根据往期内容,我们的解码器接收的参数为:函数名称,
valprev,index,data_1,data_2,….,data_n。valprev与index初始化值为0。
- 如果解码失败或遇到错误参数,导致解码器无法正常解码,解码器会返回非0数字,脚本会记录下当前未被正确解码的行数,保存在
error列表中
- 对解码后的数据做分割处理,在这里返回的数据保存方式为:
data_0,data_1,data_2,….,data_n,valprev,index,这与输入的刚好相反,将valprev与index这两个参数放在最后,因为历史遗留问题,笔者没(lan)有(de)改动。
- 将
valprev与index保存在adlist列表的开头,用以下一次解码,并在hex_list列表中弹出这两个值,因为写入数据时不需要这两个值,这两个是解码时产生的中间值,不是数据。
- 将数据写入文件中,
a表示在末尾追加内容
linecount记录当前行数,如果linecount超过了progressblock * percent,则执行percent ++ 操作。例如:文件中共有100行数据,则totalcount=100,progressblock=10,现在当linecount=11时,则会导致linecount > percent * progressblock,则会对percent+1,此时percent= 1- 如果上面的条件达成,则会将
percent=1的消息通过q.put方法放到队列中
- 此时,在进度条对象
ProgressBar中的update_progress方法中的percent = q.get()在阻塞,检测是否有新消息,现在得到了新消息,则将消息赋值给percent,如此,就实现了解码的进度传递给进度条组件的操作。
以上便是解码启动器脚本,下面给出编码器启动脚本,原理相同,代码改动不大,笔者就不做赘述
 1
 2
 3
 4
 5
 6
 7
 8
 9
10
11
12
13
14
15
16
17
18
19
20
21
22
23
24
25
26
27
28
29
30
31
32
33
34
35
36
37
38
39
40
41
42
43
44
45
46
47
48
49
50
51
52
53
54
55
56
57
58
59
60
61
62
|
import subprocess
import queue
import sys

def ADPCMencodeRun(filepath,q):
    print("ADPCM encode start")
    with open('workspaces/adpcm.txt', 'w') as fw:
        fw.close()

    error = []
    linecount = 0
    totalcount = 0
    progressblock = 0
    percent = 1
    if sys.platform == 'win32':  # 仅在 Windows 上使用这个设置
        creation_flags = subprocess.CREATE_NO_WINDOW
    else:
        creation_flags = 0  # 在其他平台上没有必要使用这个参数
    ###···················DEXP ADPCM编码··························
    with open(filepath,'r') as f:
        print("ADPCM encoding ...")
        adlist = []
        adlist.append('00')
        adlist.append('00')
        lines = f.readlines()
        totalcount = len(lines)
        progressblock = totalcount / 100
        for line in lines:
            for i in range(len(line)):
                if line[i] == ' ' or line[i] == '\n':
                    adlist.append(line[i-4:i])
            # 若打包,用下面路径
            #args = ["_internal/res/AdpcmCodec/adpcmencoder.exe"] + adlist
            # 若调试,用下面路径
            args = ["src\\tools\\adpcmcoder\\adpcmencoder.exe"] + adlist
            #print(args)
            result = subprocess.run(args, capture_output=True,text=True,creationflags=creation_flags)
            #print("STDOUT:", result.stdout)
            #print("liencount:",linecount)
            if result.returncode != 0:
                error.append(linecount)
            else:
                hex_list = result.stdout.split()
                adlist.clear()
                adlist.append(hex_list[len(hex_list)-2])
                adlist.append(hex_list[len(hex_list)-1])
                hex_list.pop()
                hex_list.pop()
                hex_list = ' '.join(hex_list)
                with open('workspaces/adpcm.txt','a') as fw:
                    fw.write(hex_list)
                    fw.write("\n")
                    fw.close()
            linecount += 1
            if linecount > percent * progressblock:
                #msg = f"已完成{percent}%"
                q.put(percent)
                #print("msg:",msg)
                #print("linecount:",linecount)
                percent += 1
    q.put(percent)
    print("ADPCM encode done")
|
总结
这是一个简单的实现线程之间消息传递的模式,在我的实践中是可行的,至此,我们实现了音频编解码器的功能模块,并实现了一个新的组件,即进度条。当然,这个功能模块尚不完美,后续还会持续地检查并优化(如果有优化方法的小伙伴也欢迎私信我)。在这里我整理了几点不足:
- 首先,ADPCM的编解码器通过
subprocess的方法循环调用确实有些笨拙,也比较吃性能,在频繁地启动编码器过程中,往往会损失大量的时间
- 其次,在实际测试过程中ADPCM的编解码速度时好时坏,同一份数据,有时候会非常慢,有时候又会非常快,我通过观察脚本的硬件调度,发现内存占用比没有发生很大的变化,但是GPU的调度会有明显变化,当GPU持续被分配给脚本时,编解码的速度会非常快,当GPU没有被分配给脚本时,编码速度会变得异常慢。为什么会产生GPU分配的差异原因笔者还没查出来,在代码中,Python也没有显式地说明在什么环节会调用GPU,笔者也没有刻意地去调用GPU,如果直到原因的同学可以私信我。
percent这种简易(甚至说简陋)的粗暴计算编解码进度的方法实在有些拙劣,可能还会产生其它对进度预估错误的情况发生。我推测可能会产生bug的一种场景是,当adpcm编解码速度过快,进度条还未处理上一条消息的绘制时,下一条消息就来了,可能会导致缺画漏画的情况,笔者还没测出,但笔者会持续改进算法,也希望各位大佬能够指点一二。
到目前为止,音频编解码器模块的代码已经全部出来。
-
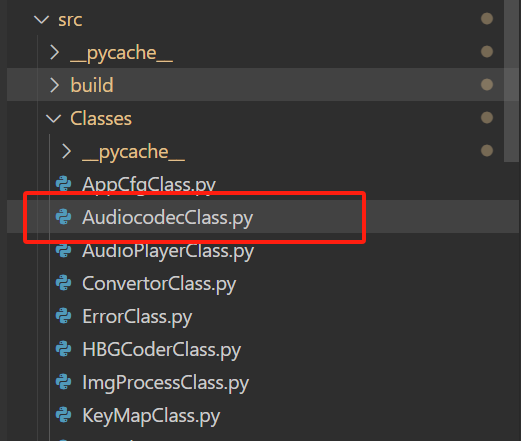
我们先从UI界面开始,通过PrimeWindow的stack切换到音频编解码器模块,即本文出现的第一个代码,那里实现了编解码器功能区的UI
代码存放的工程目录如下:
-
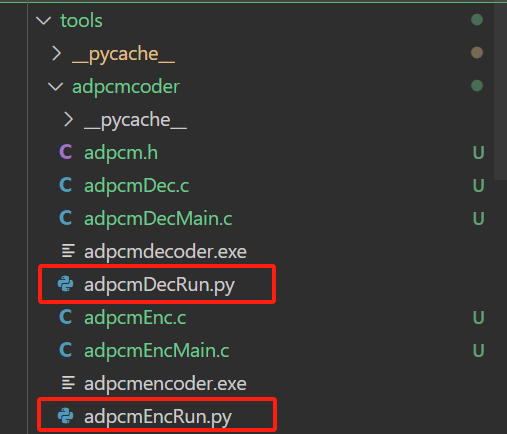
之后,便是音频编码器的启动脚本与解码器的启动脚本都在本文中展示了
工程目录如下:
-
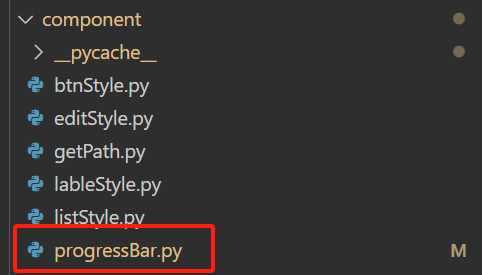
再者,到进度条样式的实现,在上一篇文章中实现了
工程目录如下:
-
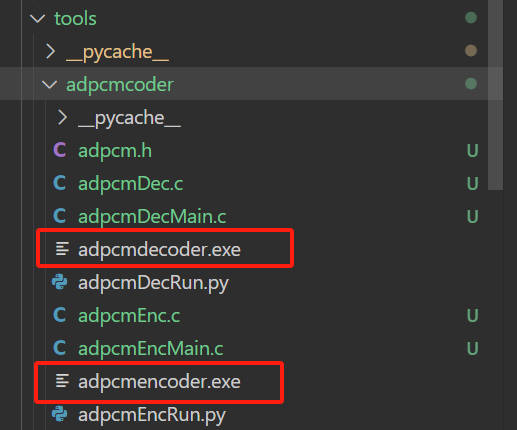
最后,到编解码器的实际实现,这部分是通过C程序实现的,在上上篇文章中实现了
工程目录如下:
阅读完这三篇文章,加上熟悉本系列前期的基础,即工程布局架构,你可以轻松复制我的代码,实现自己的音频编解码器,快来试试吧!有任何疑问请联系我,祝你变得更强!
因为语音编解码器功能模块的实现较为复杂,而且也增加了一些新的UI设计,因此知识点与代码都无法在一篇文章中全部呈现,但将代码分散在不同的文章里又让一些基础比较薄弱的同学难以快速上手,因此,如若对此模块感兴趣的人比较多,笔者将在这三篇文章的基础上,单独开一篇新的博文,梳理代码的布局以及如何在自己的机器上跑起来,让新手小白也能复制即用。